Showing posts with label Crafts & Other things to make. Show all posts

Sunday, December 15, 2013

Advents Calender Ideas

**All images in this post are from Google Images. I take no credit.**

Hello!

This post is about making your own advents calender which you can reuse year after year. I know it's a bit late for this year, but you can make them to start using next year and they make great presents.

Idea No.1
You know what bunting is, that stuff which people hang up on festive occasions? 
http://www.justbunting.co.uk/wp-content/uploads/2012/08/Bunting-Brights-Debby-.jpg 
 Well, this idea is for a bunting advents calender!
 
To make it, follow these steps:
 
  • Cut out 48 triangles of fabric in festive colours, such as red, green, golden, etc. 
  • So them together, leaving the top of the triangle open. If you have done sewing before, you will know to sew on the backside of the fabric and then turn it inside-out when you're done.
  • Overstitch the top edge so it doesn't fray. 
  • With a fabric pen, write on each triangle a number from 1 to 24.
  • Sew the triangles onto a string, and hang it up.
  • You're done!
In each of the triangles you can put a small present like a bead, a sweet, or something like that.

 Idea No.2

Do you have lots of clothes left over from when you and your siblings were little? What about socks?
http://assets.inhabitots.com/wp-content/uploads/2009/11/recycled-baby-socks-3.jpg
This idea is to make an advents calender out of old baby socks! Just follow the steps...

  • Collect 24 old socks, and make sure they're clean. 
  • Write a number on each of them with a fabric pen if you want. 
  • Sew them onto string, and hang it up. 
  • You're done!
You can put a bead or a sweet or something in each of the socks.

Good luck making!

~Dawn

Wednesday, December 4, 2013

Make a Draughts Board

Hello! Sorry I didn't post sooner. The computer wasn't working for a bit, my cat died, and I've been ill.

Anyway, here is how to make a draughts/checkers board:

You'll Need

  •   Cardboard
  • Pencil
  • Ruler
  • Black or white paint
  • 24 bottle tops, half of which one colour and the other half another colour
With the ruler and the pencil, draw 64 squares on the cardboard and then paint them in, so that it looks something like this:
http://i2.minus.com/igWaDW1XW3Qti.jpg

And tada! You're done! The bottle tops will be used as the counters to the person who recieves the present. 

~Dawn

Monday, October 21, 2013

Pressing Autumn Leaves

Hello! SilverDawn here with another post for you to read and then comment on! XD

First of all, a quick note: I've made picture links on the side to some more pages...go and have a look!

Going on to what this post is about, I'm sure you've heard of pressing flowers - putting flowers in a flower press for a little while so they go dry and are preserved. But there aren't many flowers at this time of year, so why don't you press autumn leaves? I'm sure you can find lots of very interesting ones. 


You don't need a flower press, either; all you need is four heavy books and some paper. Get your leaves, put them side-by-side but not too near each other on a sheet of ordinary paper, and put another sheet of equally ordinary paper on top. Then, carefully place the paper-and-leaf sandwich on a shelf, then put the books on top. Autumn leaves don't need as much time to press as flowers do; after two days they should be done!

Another option for pressing is putting the paper-and-leaf sandwich under a rug or mat on the floor and letting everyone walk over it for a day. Then, take your paper-and-leaf sandwich out, and put the rug back in place. 

Once you have pressed leaves, you can use them for all sorts of things. You can glue them on paper and frame them, or put them in an album, or glue them on thick paper to make seasonal cards to send to your friends and extended family. 


Happy leaf pressing! :) Please send in photos of your pressed leaves and what you make out of them to treaclepuss@yahoo.co.uk and I'll post them on the Readers' Creations page.
 If you want to think philosophically about autumn leaves, click here to read something I wrote on them!


Friday, September 20, 2013

Dolls' Houses

*No, you don't have to be a little baby who likes playing with dolls to find this interesting, so do NOT go away! For one thing, you'll find there's more to this post than just dolls' houses, and for another, there are a lot of adults who collect dolls and enjoy setting them up in their houses and getting nice furniture for them. So please read this post right down to the bottom.*

If your family has been moving around a lot, like we have, then you'll probably have lots of cardboard boxes.

Ask your parents if they have any spare ones. Then, you can start getting creative!

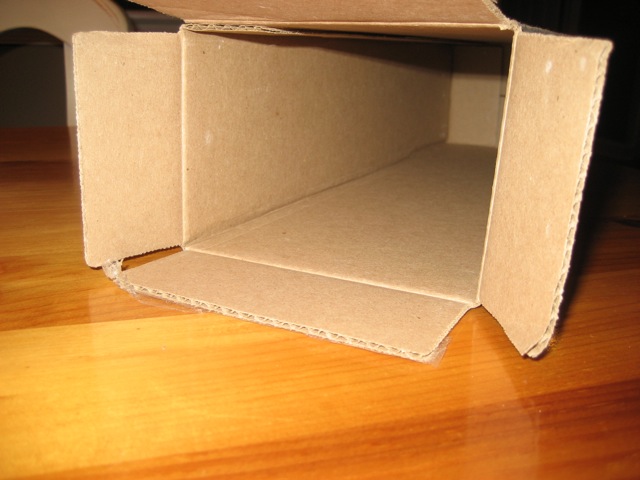
Turn the box over, like this...

Then, with some scissors, cut a square in each side of the box. Then, go and find an old packet of something-or-other, the sort with some clear plastic over the front, this sort of stuff:


Cut a square a few centimetres larger than the squares you cut in the cardboard box, and, if you like, draw a cross on it with a marker. Then put it inside your box, against the cutout squares, and selotape it there. You now have windows!

Cut two pieces of cardboard out of another box, one of them with a taller strip going up. You can make a window in one of them, if you like. Then selotape the bottom of each one of these to one side of the cardboard box's top, then selotape them together in the middle. 

You now have a perfect dolls' house! You can now start designing the inside...

Get some sheets of ordinary white paper, and, if you like, draw a simple pattern on them. Then, glue them to the inside walls of the dolls' house, for wallpaper. If you made your house out of white cardboard, then it will already have white walls and you won't need to do this. 

Then, if your family drinks Yorkshire Gold Tea, then get an old packet and cut it up into small rectangles. You see why? The packet has a beautiful scenery design. 


If you don't have a packet of Yorkshire Gold, then find another packet of something else which has pretty pictures on it. We found some pictures of fields of wheat on a weetabix packet. 


Cut these pictures out, and then stick them on the walls of your dolls' house to decorate it. You can even make them frames out of brown paper. You could also cut pictures out of magazines or anything. Why not draw some more tiny pictures, or even make tiny posters? 

Then, you have to think about furniture. Even if you can't buy proper dolls' house furniture (if you can, then try eBay) you can still furnish your dolls' house. Make a partition out of cardboard, and put an old soapdish or even a tiny white box on one side of it, for a bath.  Try cutting up an eggbox and see what you can make. As for beds, the dolls' house doesn't need to have actually bedsteads, and you can make tiny mattresses out of fabric, if you can sew. If you can knit, you can knit them some little blankets!
If you know a little about carpentry, you can even make some tables, beds, and shelves out of wood. My sister did that. 

By now, your dolls' house would be complete! You should also have plenty of ideas of other things you can make out of cardboard boxes, in the same way, like castles, boats, gypsy caravans, and other things. And these don't have to be used for dolls, they can be put on display, or used for some other sort of toy. 

Thank you for reading! ^.^


Wednesday, September 11, 2013

Mobiles

Hello! ^.^

I've decided to start posting stuff to make and do on this blog, and I decided to start with mobiles!

No, I don't mean this sort, thank goodness:

I mean this sort!
Sorry, bad photo, but you get the jist. And yes, it's hanging from a ceiling-light. 


How to make one...

  1. Choose the theme. It could be a beach themed one, or a four seasons themed one, or a meadow themed one. Personally, I made a forest themed one. 
  2. Collect the hanging objects, such as seashells if you're doing a beach themed one, or dried grasses for a meadow themed one. Or whatever you can think of! Be creative! You will need four objects. Choose ones which will not rot or shed parts of them. 
  3. Find two sticks of a good size. It's great if you can find some which match your theme, such as driftwood for a beach themed one. I used sticks with moss and lichen on for my forest themed one. 
  4. Cross the sticks over each other and tie them together.
  5. Tie a piece of string from the ends of each stick.
  6. On the other end of the stick, tie one of the objects. 
  7. And you're done! Hang it in a room, or give it to a friend. 

Going Further...

Once you've made a number of ones like above, try experimenting further. If you look "hanging mobile" up on Google Images, it will show you lots of different elaborate styles for how you tie the sticks, etc.! Also, instead of hanging things from Nature on your mobile, you can choose Christmas decorations (they'll be hangable), for a Christmas mobile - or you can make a painted Easter egg mobile - or anything else you can think of! 
Happy creating! :b

PS. A big thank you to FrostWolf for this beautiful signature!